The section on zeroing a rifle in TC 3-22.9 begins like this:
Zeroing a weapon is not a training exercise, nor is it [a] combat skills event. Zeroing is a maintenance procedure that is accomplished to place the weapon in operation, based on the Soldier’s skill. Capabilities, tactical scenario, aiming device, and ammunition. Its purpose is to achieve the desired relationship between the line of sight and the trajectory of the round at a known distance.
TC 3-22.9, Rifle and Carbine, page E-1
The TC goes on to teach Soldiers how to methodically and accurately zero their service rifle. The TC can be found on my references page here. Below I’ve summed up the information provided.
Additionally, Fort Benning and the Army Marksmanship Unit have put out an exceptional series of videos on shooting topics. Embedded below is their video on zeroing.
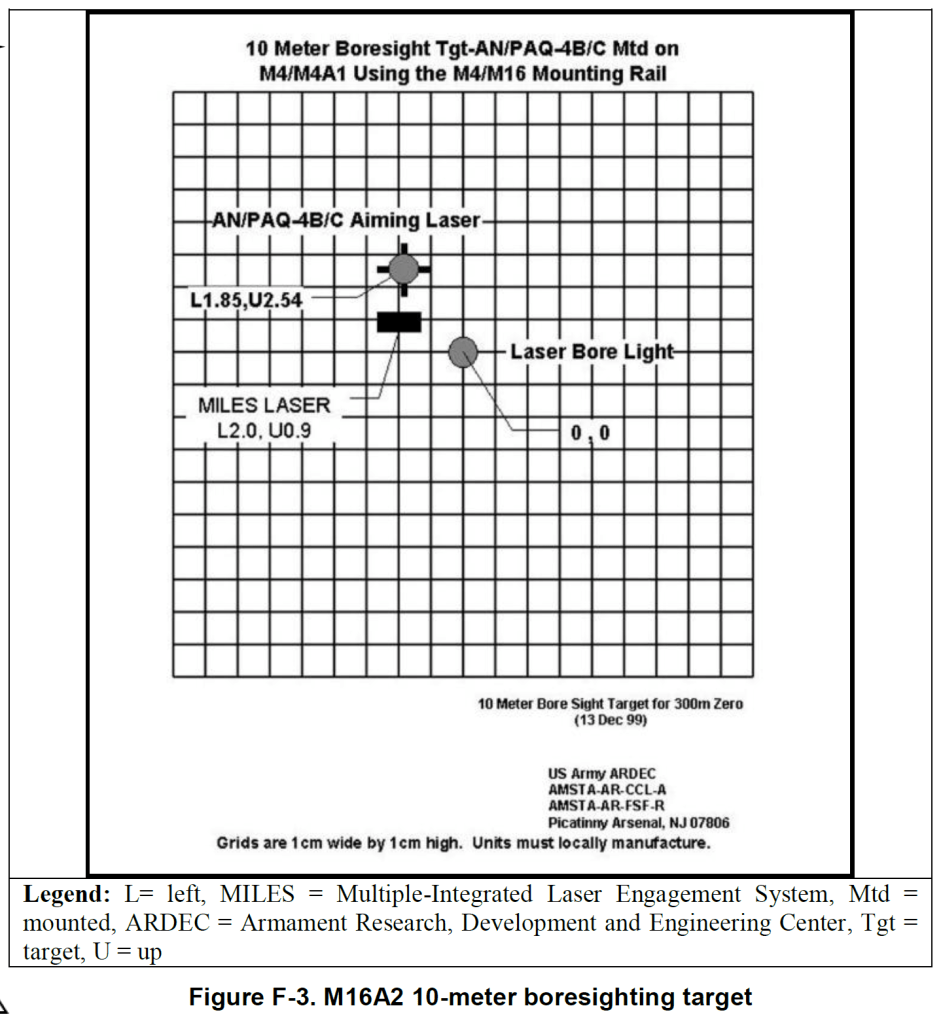
Prior to zeroing on the range, Soldiers with the equipment should laser borelight their weapons. The particular brand of borelight will come with instructions, however there’s a link to a great write up on how to boresight a weapon here. Additionally, the TC mentioned in the previous paragraph goes into great detail on this process in appendix F. The graphic below shows what a boresight target looks like.
Next, a Soldier begins grouping and zeroing exercises. A ‘group’ is a shot group, or series of impact holes in a target. The closer these impact holes are, the ‘tighter’ a group is. Having a tight shop group is integral to being an expert rifleman.
Soldiers can be both precise and accurate. Precision is maintaining a tight group – putting rounds into roughly the same spot every time. Accuracy is putting rounds into the desired spot. Ideally, those are the same place, but often they are not. Soldiers need to achieve a tight grouping – precision – before attempting for accuracy. A precise shot group means that the Soldier is able to replicate their shot, implying some measure of control over the fundamentals of the shot process. Once a grouping is tight – once the shooter is shooting precisely – the move to accurate shooting at the center of the target is a relatively easy process. The following table demonstrates how a shooter can move from the grouping stage to the zero stage, as well as how much and what kind of ammo is authorized for zeroing based on optic used:

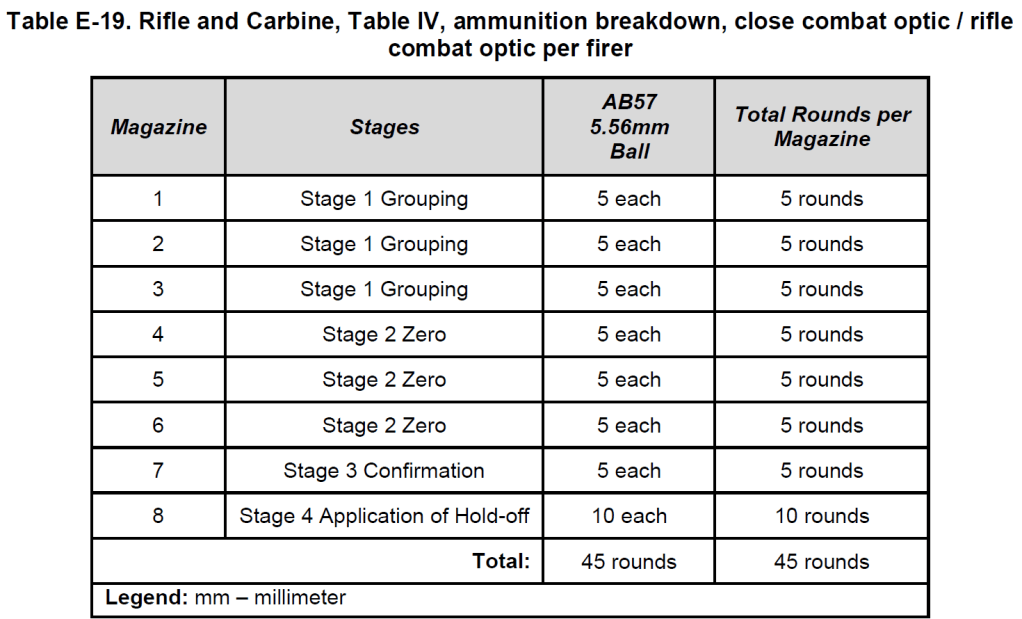
Notice that the table indicates a shooter group first, then move on to zeroing. The table also indicates that shooters use five-round shot groups. This is important, as it allows a shooter to better understand their grouping. A three round group often includes a ‘stray’ round – the shooter shifted slightly, or breathed a bit differently – that doesn’t accurately portray the shooter’s group. For this reason, a five-round group is recommended.
Standard in Training Commission (STRAC) Department of the Army Pamphlet
(DA PAM) 350-38 allocates ammunition to conduct zeroing procedures using three-shot groups. The preferred method is to use a five-shot grouping, allowing the firer to more accurately analyze their shot group.
TC 3-22.9, Rifle and Carbine, page E-7
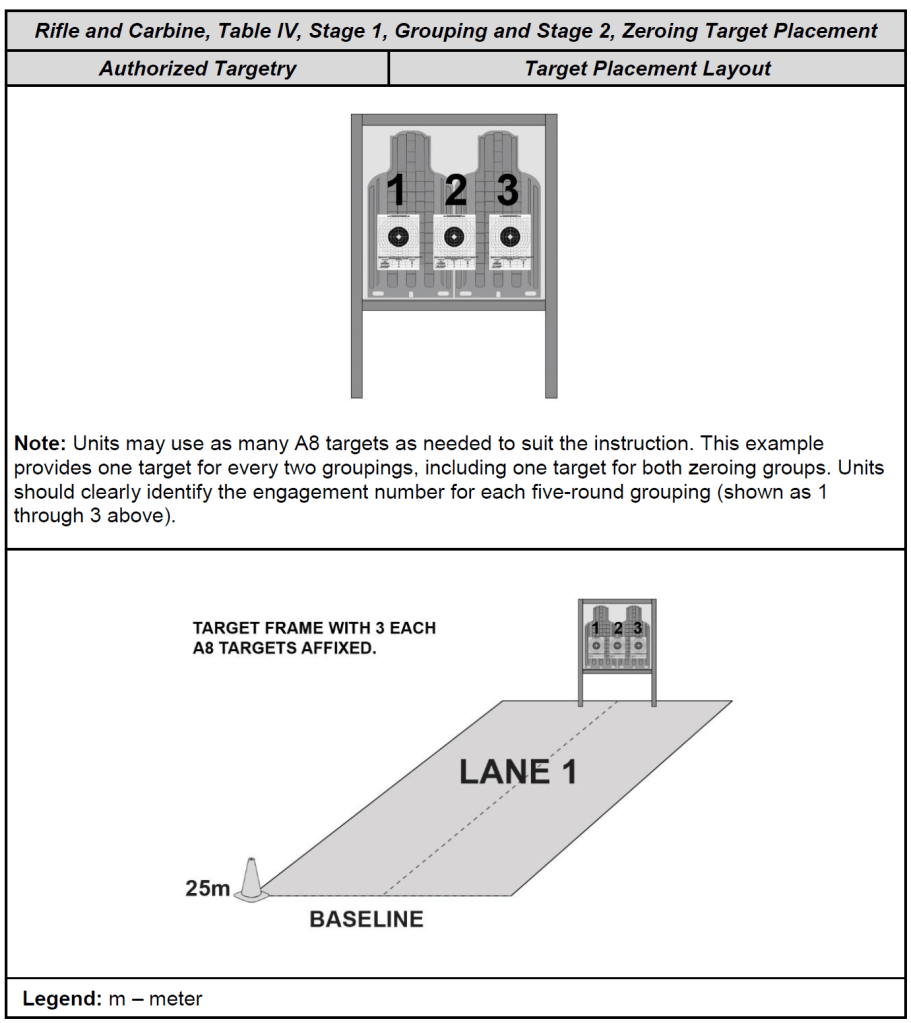
The following graphic details which facilities are to be used:
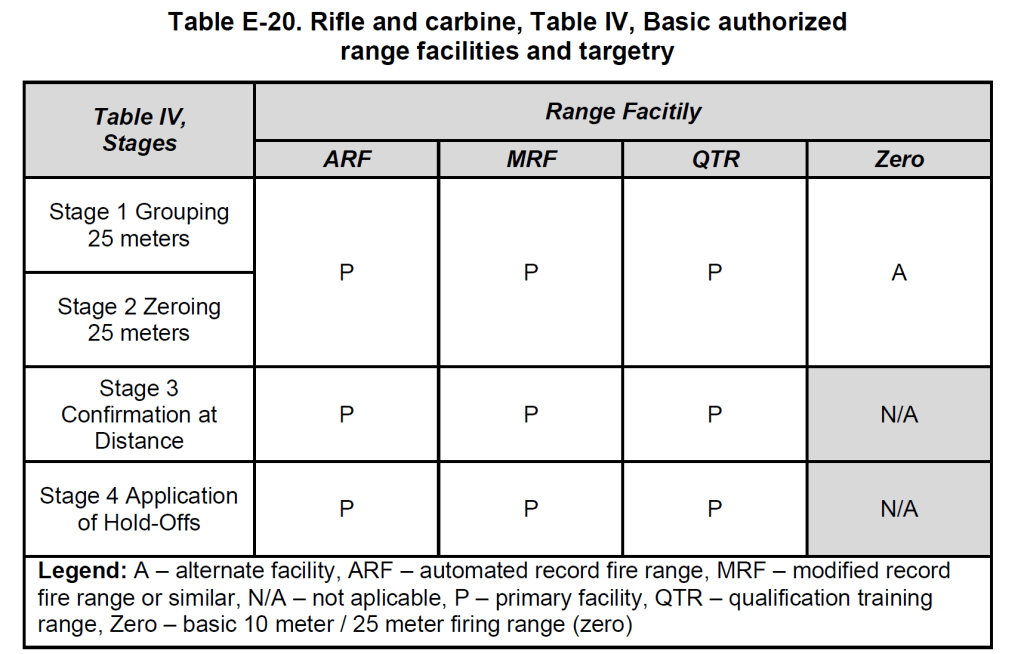
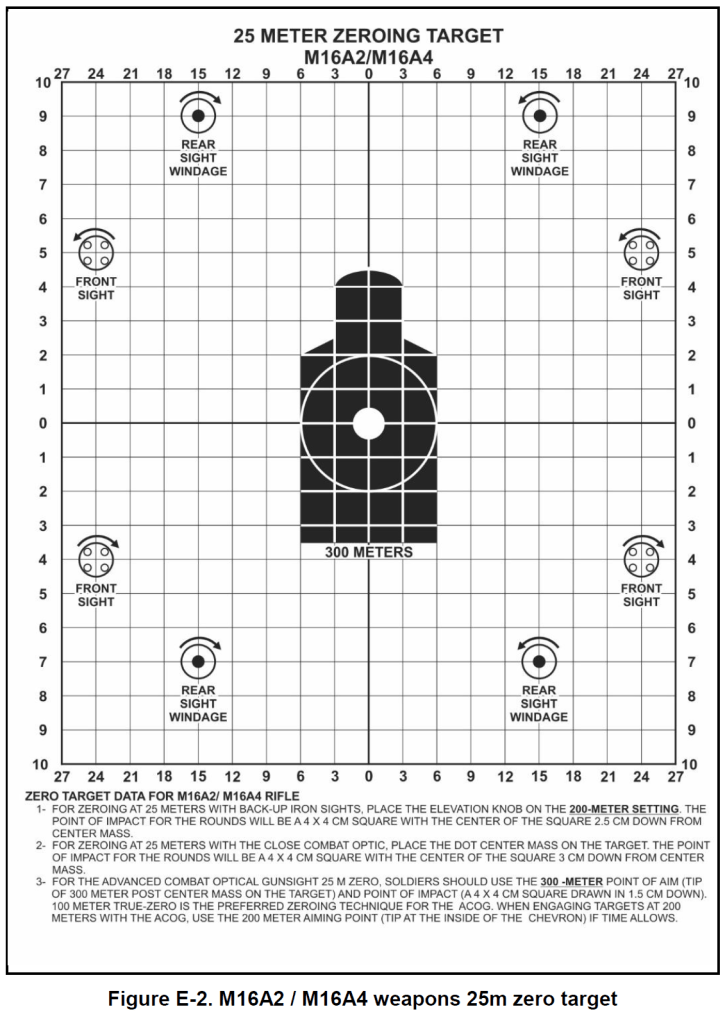
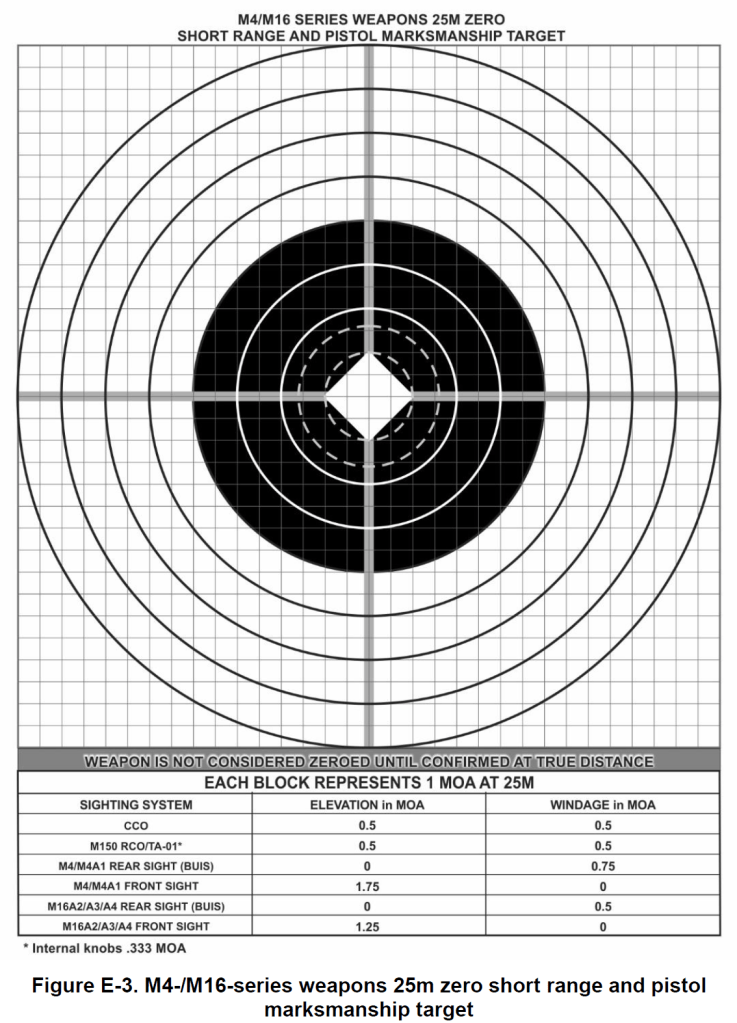
Soldiers firing a zero should not use the automated targets at their facility. Instead, shooters should use the 25m lane with framed targets. The following graphics show different targets with their appropriate uses, as well as the appropriate range layout for zeroing.
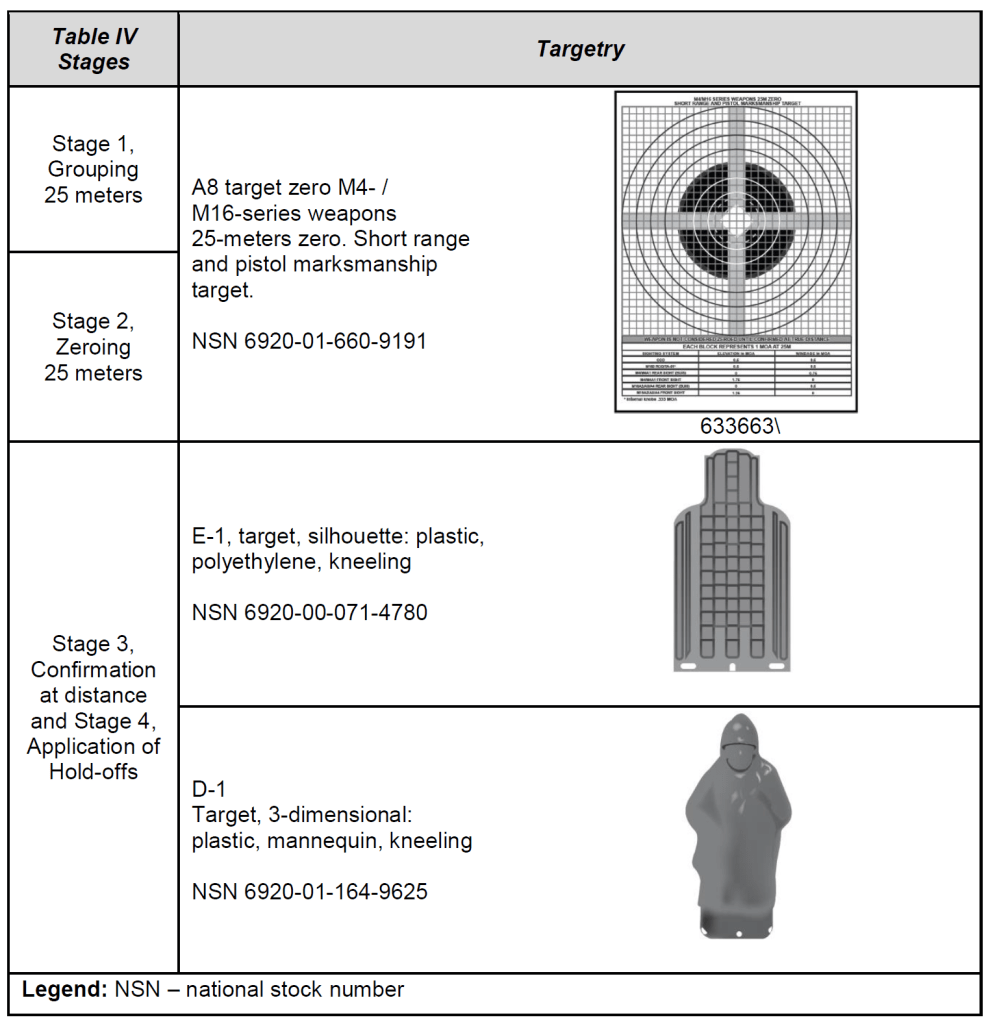
The following graphics show two targets: one is the older M16 style zero target, and the next is the more modern M4 style zero target. It’s important for a shooter to know which rifle they have, and to ensure that the appropriate target is being used. Often the two targets are printed to the reverse of one another.
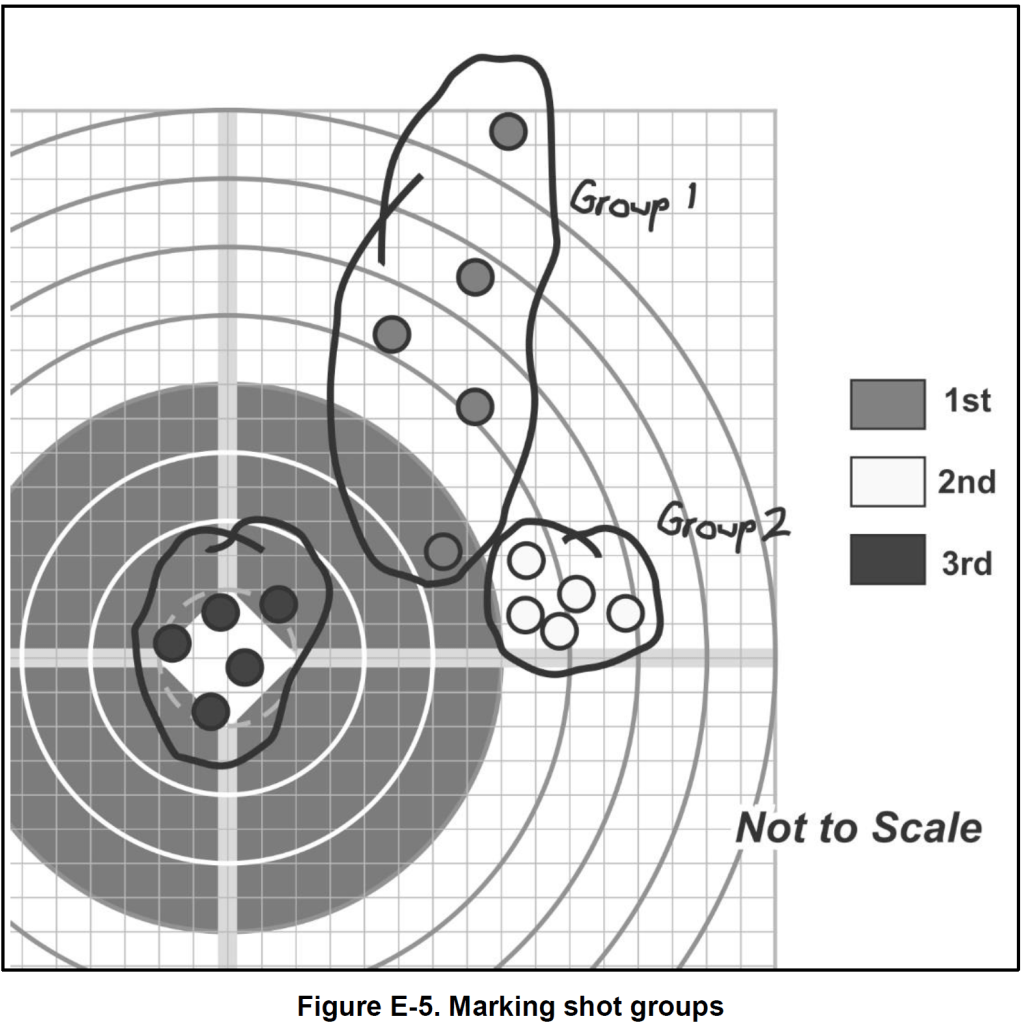
Shooters should mark their shot groups to best understand the results changes to their bodies, weapons and breathing, as demonstrated in the graphic below.
As Soldiers are attempting to make their grouping more precise, a coach is absolutely necessary. The coach should be acquainted with the shot process, and understand what they’re looking for when watching another Soldier. Coaches should not watch the target, and instead should watch the shooter to ensure fundamentals are being applied. Some of these fundamentals include: good cheek stock weld; a slow steady trigger squeeze; the body and arms creating a solid and immobile foundation; breath control and proper seating of the buttstock in the pocket of the shoulder. After the tower or range OIC has called a cease fire, the shooter and coach should move downrange to observe and mark the previous shots.
The following graphics provide some insight on how to analyze various shot groups.
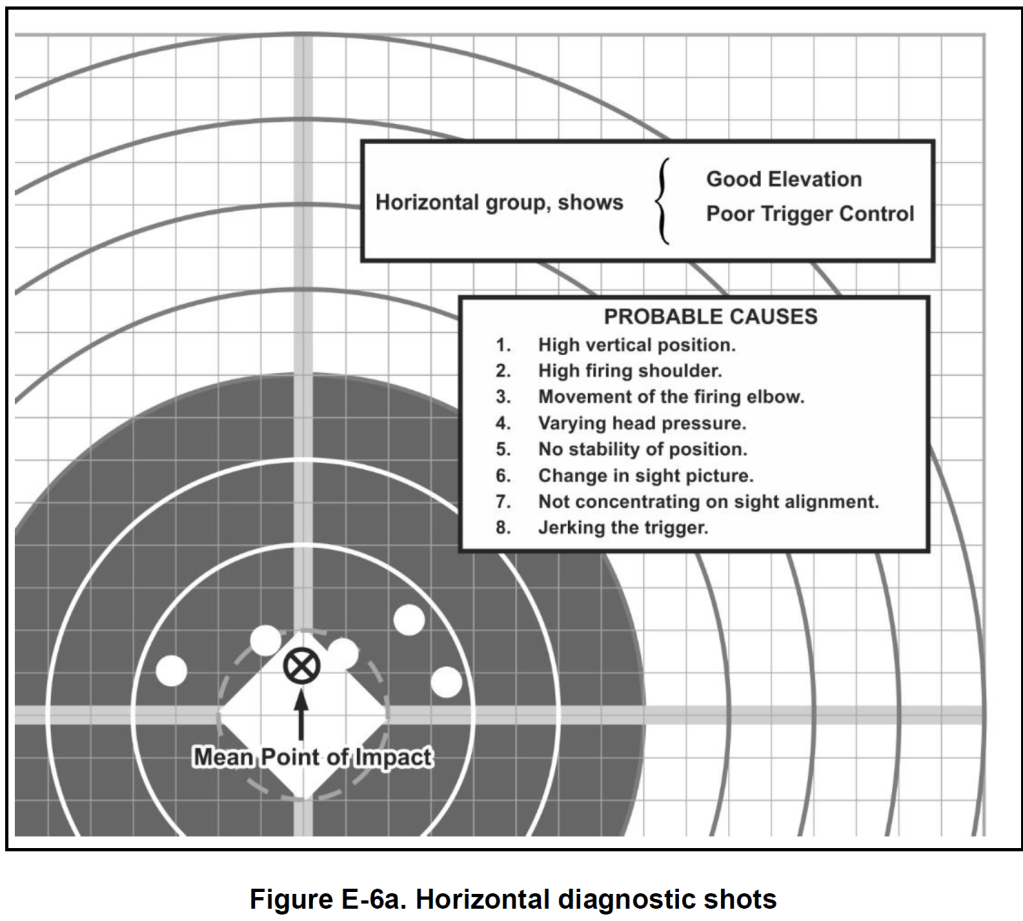
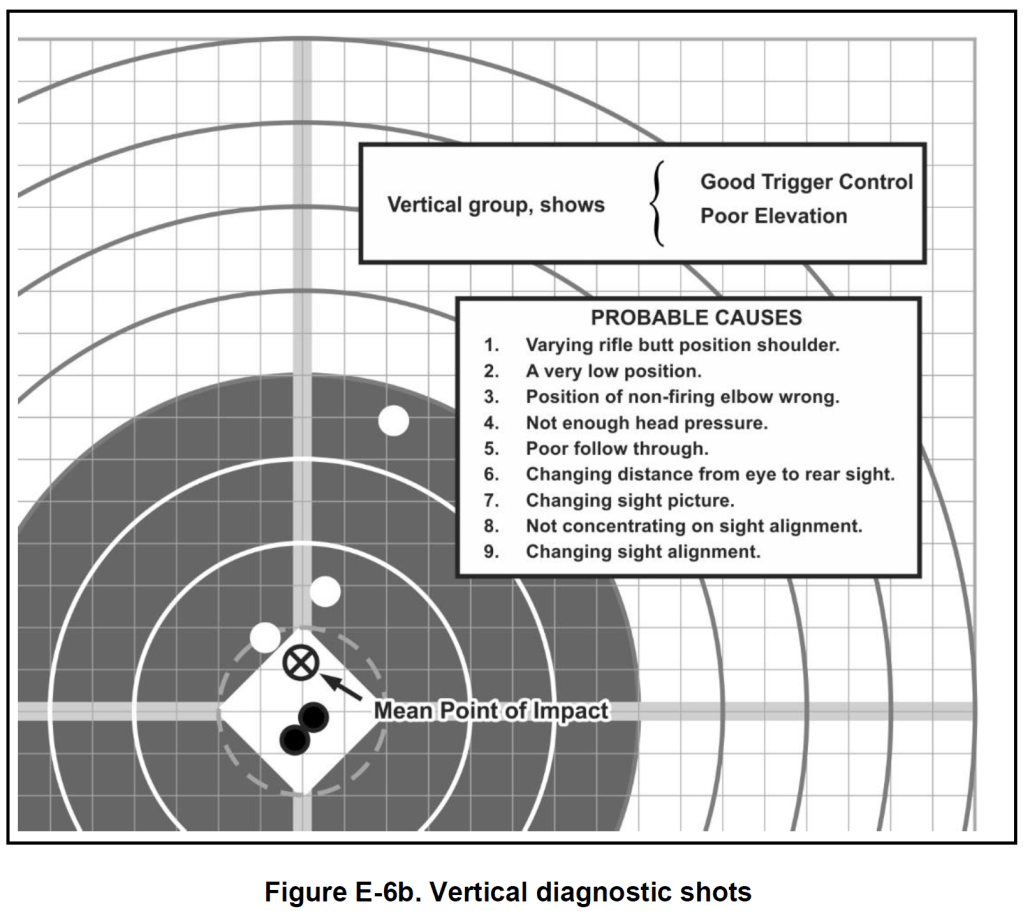
Additionally, the TC has this to say about large shot groups:
Large groups are most commonly caused by the shooter looking at the target instead of the front sight. This causes the shooter to place the front sight in the center of the target without regard for its location in the rear sight aperture. A small misalignment of the sights will result in a large misplacement of shots downrange.
TC 3-22.9, Rifle and Carbine, page E-15
Moving on from precision, a shooter can begin to focus on accuracy.
Once the firer has shown their ability to accurately group, they should begin adjusting the aiming device to move the groups to the center of the target. During the zeroing process, the firer should attempt to center their groups as much as possible.
TC 3-22.9, page E-2
Once Soldiers have made optic-specific adjustments to their rifle and optic (ie, moving up and left a certain number of turns on their optic to correspond with to the number of boxes the ‘center’ of the shot group is from the center of the target – see your specific target for more information on how to make adjustments), the firer should move on to the 300m confirmation zero.
The 300m confirmation zero is the most important part of the process. Shooters should always confirm their zero at distance. The zeroing process is not complete until this step is taken. Once this step is taken, the zeroing process is complete – and Table IV is nearly complete, requiring only a demonstration of the relevant rifle holds.
Please continue on to the following links to better understand each table individually.
